


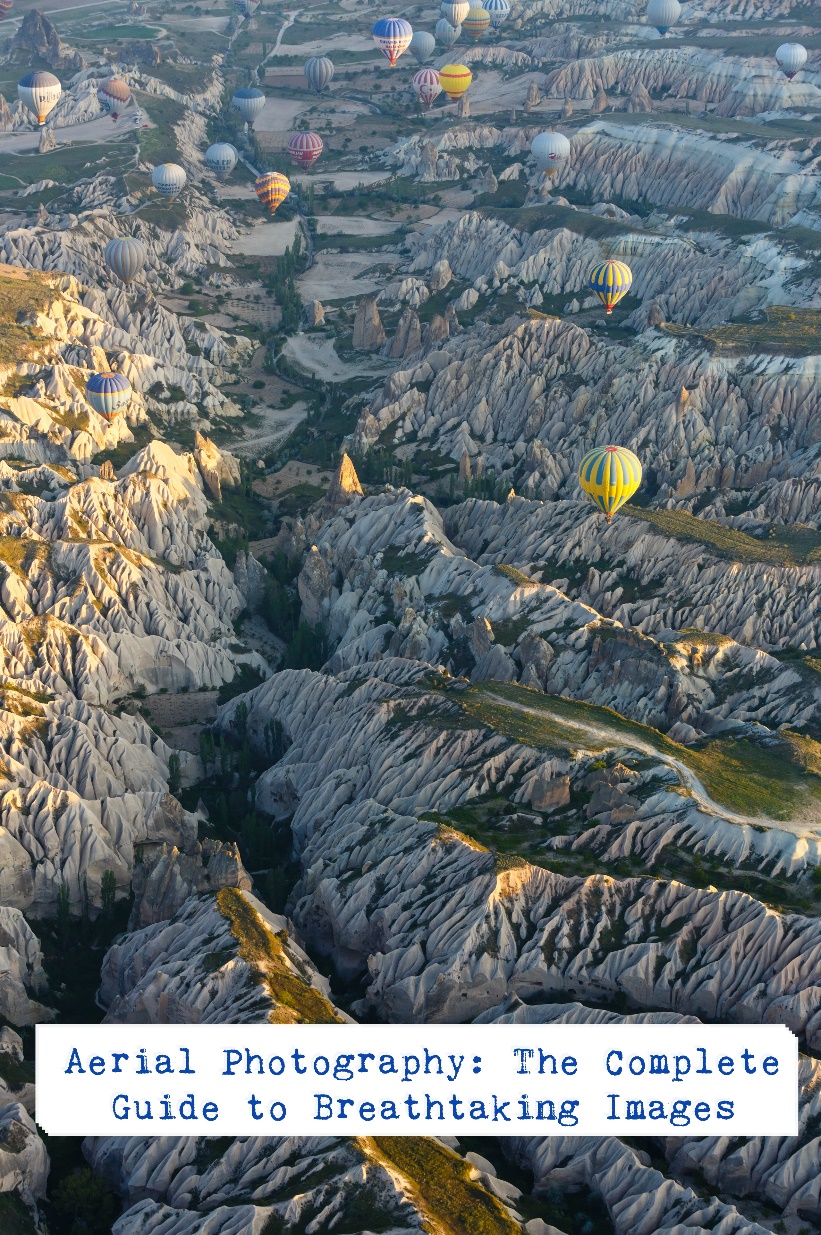
Aerial Photography: The Complete Guide to Breathtaking Images

Aerial Photography: The Complete Guide to Breathtaking Images
Aerial photography is the result of constant technological improvement paired with the unique, creative vision of true artists. How else could such compelling pictures be created? Yet the question is, how are photographers capable of such digital artistry, and more importantly, is it possible to learn the technique?
Aerial photography and filming are demanding fields, but with a bit of patience, a lot of reading, and just an ounce of inspiration, you’re bound to capture great images as well as enjoy the nice aerial photography prices customers pay. This complete guide to aerial photography will help you through the entire process.
Today’s guide gives you an overview of what aerial photography is all about. Here’s what you can expect to read about:
· How to choose the best gear: for being flown around, as well as camera equipment.
· Session and flight planning: mapping, timing, and other details.
· How to stay safe: know the safety regulations and flight legislation.
· Down to the nitty-gritty: camera settings, angles, and more.
Navigation
What is Aerial Photography?
The step-by-step process
Step 1: Choose between Personal and Remote
Step 2.1: Prepare Your Equipment
Step 2.2: Equipment for taking photos with a UAV
Step 3: Plan Your Mission and Flight in Advance
Step 4.1: Mind Safety and Regulations
Step 4.2: Take your photos!
Step 5: Things to do or Keep in Mind While In Flight
Step 5.2: Decide on your angles
Step 5.3: Take your photos!
The Biggest Technical Challenges of Aerial Photography
What is Aerial Photography?
Quite simply put, it is the branch of photography that deals with aerial shots.
Or, if that seems a circular definition, it’s the photographing of targets on the ground from an elevated position that is not connected to the ground. The aerial view is not from a vantage point, which is an elevated natural form or man-made structure.
Also, the view that the photographer captures is always below the level of the photographer, as opposed to air-to-air photography which focuses on capturing images of airborne subjects, on a level with the photographer, while the photographer is also in the air.
Tip: Aerial photography doesn't necessarily have to mean an aerial photography business, despite the boom that real estate aerial photography has experienced.
During the course of history, aerial photography has developed many more, diverse, applications (art, cartography, photogrammetry, environmental studies etc.).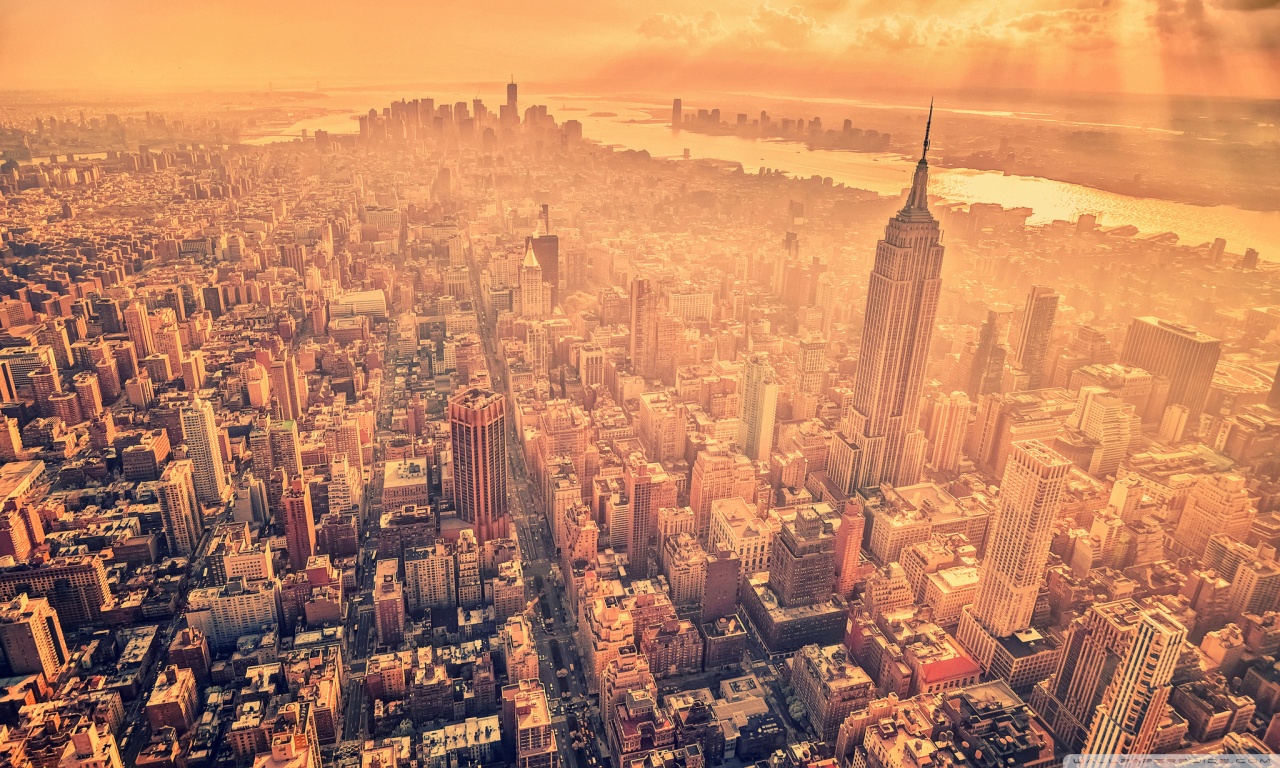
The step-by-step process
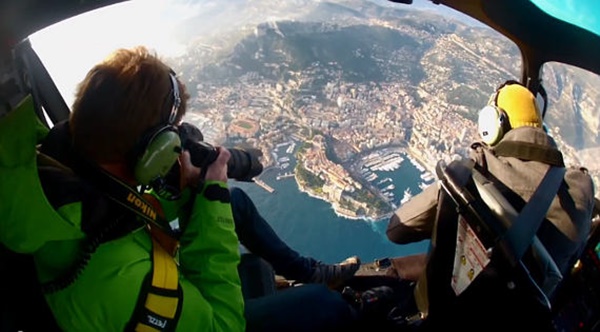
Step 1: Aircraft Choice and Flying
When you embark on your aerial photography journey, you won’t need fancy planes or out-of-the-ordinary helicopters. In fact, the most effective choice is to go with a slow, high-wing plane, such as the Cessna simple engine. They are an accessible alternative to today’s high-tech planes, especially since helicopter and plane rides are extraordinarily expensive (expect anywhere from £500 per hour).
What not to do when shooting out of an airplane
Even if you feel as though there is no alternative other than shooting through the window of an aircraft, don’t. There’s no chance of getting a clear, undistorted image since aircraft windows are made of Plexiglas, which by nature, is not flat. All you’ll end up with will be wavy images (as though they were submerged underwater). This is particularly evident when using telephoto lenses.
Your only option is to get the window to open.
Discuss the issue with the owner or the pilot before taking off. For some aircraft, it’s a matter of unscrewing a small head screw. For others, you just rig the window open all the way. Either way, make sure to have a great pair of ear plugs!
Finding the Pilot
Another great option is to find any small airport offering flying lessons and ask the instructor whether they’re open to having you on board. Rates differ, of course, but you may just find some open-minded individuals willing to give you a hand.
Step 2: Prepare your Equipment
Step 2.1: Equipment for manned flight
The following items are must-haves when capturing aerial images:
- Camera(Some experienced photographers carry multiple cameras with them)
- Lenses
- A Memory Card
- Batteries and Spares
- Your Camera Bag
- Straps/Harnesses
There are, however, certain things that you need to be mindful of. Most importantly: shock protection. You’ll need to care for your camera and lenses throughout the flight. If you’re using a DSLR camera, you’ll also need to be mindful of UV protection for both camera and lenses (of course, changing lenses mid-flight is a photographer’s worst nightmare – you’ll have to rebalance the gimbal every time and in the unlucky event that you don’t own an automatically balancing gimbal, you’re in for difficult time).
Another issue with DSLR cameras, though, is that you’ll have to compensate for in-flight movement. For that, you’ll need a hi-speed lens paired with a low to medium ISO sensitivity. You’ll also need to have image stabilization active and work with shutter speeds well over 1/250 s.
Aside from DSLR cameras (with the downsides we just mentioned), you can always choose micro four-thirds cameras such as the Lumix GH4 or the Sony AS7. However, for wide angle shots, your best option is a full-frame camera that ensures that your shot remains as wide as possible. The Leica 28mm Elmarit, for instance, is a great option to consider.
In our experience, however, there are other pieces of equipment to consider for aerial and landscape photography (particularly if you plan to capture night-time shots). Since aerial photography comes down to shutter speed and focal length, you’ll be well served by a telephoto lens (70-200 mm, or even longer). Luckily, your depth of field when shooting with such lenses will be wide, even if you choose big aperture settings.
Canon, Nikon, and Tamron all offer high-quality lenses, however, Tokina also has a considerable offering. Depending on what you hope to accomplish, you may go for a 250 or 300 mm lens (just because, at maximum focal distance, you may end up losing sharpness).
Finally, on memory cards. As you'll be taking lots of photos so that you have where to choose from, because the motions of the plane/helicopter will mess up most of them at first, you should consider using a big memory card, with at least 32 GB of memory. When shooting video, however, it’s all about the speed of the memory card (and not the memory).
Also, you’ll want to shoot in '.RAW' format, which does tend to produce large image file sizes. Also, consider taking more than one such card with you, in case you need to replace the main one.
Step 2.2: Equipment for taking photos with a UAV
A high-quality camera drone can also be used for taking good aerial photographs.
By its very design, a camera drone encompasses:
- A Camera.
- A Lens.
- A Stabilizer for the camera and lens (called gimbal).
- The body that holds them.
- The motors.
- Blades which allow it to fly.
- Its brain (the processor) which allows it to perform sophisticated in-flight calculations and receive commands from you.
- The controller which allows you to issue commands to it.
Tip: It's important to mention here that the term drone or UAV can refer to several types of models, from airplane-based ones to helicopter-based ones. The latter come in 4, 6 and 8 rotor versions (quadcopters, hexacopters, and octocopters, respectively). The most wide-spread models currently in the drone industry are quadcopters.
Tip: You can also buy a drone that does not have a built-in camera, but that offer you the capability to mount one on them, resulting in a perfectly functional drone with a camera.
And, speaking of the drone camera and drone lens, these can also vary greatly in functionality and shape, as is the case with normal cameras and lenses. But a common option for drone makers is to include a fish-eye lens
in their design.
Tip: If you're just starting out with aerial photography, it would probably be best to not build or assemble a drone yourself. Instead, choose to buy an RTF (Ready To Fly) drone, which is good to go from the moment you take it out the box.
Remember that the great majority of camera drones are also mainly used for video, so you can also film with them to your heart's content.
Tip: Before you fly, make sure to balance your rotor blades. Take them off, weigh them to see if any is heavier than the others, and, if so, sand the ones that need it until they all weigh the same as each other. This will lead to greater i-flight stability.
A feature we recommended to beginners, but also one much used by pros as well, is the First Person View (FPV) system that some drones come equipped with. This means that you can view on a screen exactly what the drone is filming , "through its eyes", which comes in handy as it flies further away from you.
With this in mind, if you're just starting with aerial photography, consider buying just a decent entry-level drone and do not go over-board on a really expensive one. The same applies if you have a drone with a seperate camera. Opt for a chaper camera, not your prized possession.
Recommended Read: Best Multirotor Drones for Filming & Aerial Photography
In the end, the shape of the drone itself doesn't matter that much to get you started with aerial photography, as long as it's a camera drone that can take quality pictures at a decent range and is fairly easy to control.
Note:The CAA, the governing body for drones in the UK air space, allows 400ft. maximum top ceiling for flying UAV.
Step 3: Plan your mission and flight in advance
Rigorously planning your mission in advance, including with aerial maps and GPS coordinatesif you feel like it, is a good idea, so that you're not disoriented when you actually have to take the shots. This also helps to avoid renting a helicopter or plane longer than it is needed.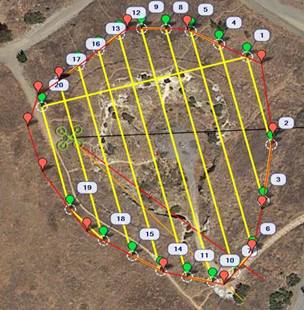
Regardless of whether you use an aerial photography drone or rent a vehicle, planning includes thinking about routes that will give you the opportunity for the best shot. Commonly used flight paterns around the objective are:
- a circle
- a box
- an in and out line
Tip: In terms of timing, take an aerial photograph inthe first hour or so after sunrise or the last hour or so before sunset, to get the perfect mix of light and shadows.
Step 4: Mind Safety and Regulations
Step 4.1: When you are personally up in the sky to take photographs
Before you get on the plane or helicopter to start shooting, review this set of common, core rules that should always be obeyed.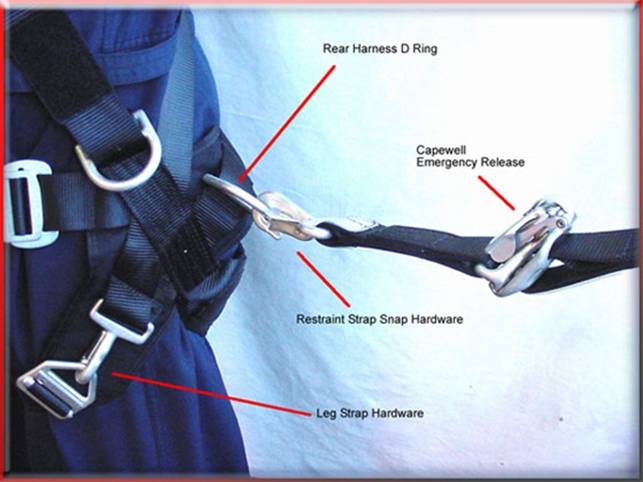
1) Safety First: Strap yourself with sturdy, safe harnesses or similar cords, by multiple points, to what's keeping you safely flying through the air.
2) Care for Your Equipment: All pieces of equipment or components should be firmly attached to each other and to you.
3) Two hands: When you have to switch equipment in-flight, do so with both hands, so that you're sure you've safely deposited the one you're done with, before picking up the new one.
4) Mind the chill: If the air can get to you (parachute, balloon, open-doors helicopter or plane with completely open/full up windows like the Cessna's 152, 175 and others can be), remember to wear warm clothing or risk hypothermia. With the exception of tropical or desert locations, it will get cold up there.
5) Tail = danger!: If using a helicopter, never walk towards the tail end before take-off and after landing, if the blades are spinning. The tail blades spin so fast that they're practically invisible to the naked eye. A moment of not paying attention could be lethal.
6) Flying objects: Also on the topic of helicopters: take the lens protection hood off before you're in the air and tuck it safely in your bag. If it should happen to come off during the flight, there's a chance it might fly into the rotor blades above or in the tail rotor, which could lead to major complications or a crash.
Tip: Be mindful that, in the US, manned aircraft cannot fly lower than 1,000ft in densely populated (urban) areas and 500ft in less populated (rural) areas.
Step 4.2: If you want to shoot remote aerial photography with a UAV
There are some regulations to observe.
Now, drone owners have to meet three conditions:
- be licensed as pilots,
- keep the drone within sight at all times
-and not fly the drone in places that may pose a risk to others.
In the UK, you can fly a drone weighing less that 20 kilos, as long as you obey these four requirements:
- keep a 50m distance from any person and 150m from any densely populated area,
- keep the drone within sight (meaning less than 120m altitude and 500m in a horizontal line),
- don't use it for commercial purposes
- do not film people without their consent.
For commercial licenses for drones with cameras, including those weighing more than 20kg, as well as any other questions or particularities, you have to address the Civil Aviation Authority (CAA), which can inform you about all the regulations.
Tip: Safety is an advantage of UAV's because injury should be pretty improbable with a light photography drone and other such light devices. With heavier camera drones, you only have to worry about them not crashing on you, anybody else or any property.
Step 5.1: Choosing the settings on your equipment
Recommendation: First and foremost, shoot in RAW mode, not .jpeg or other compressed formats. Compressed means you have a computer algorithm deciding which data is important and which isn't, resulting in the deletion of some of it.
Step 5.2: Decide on your angles
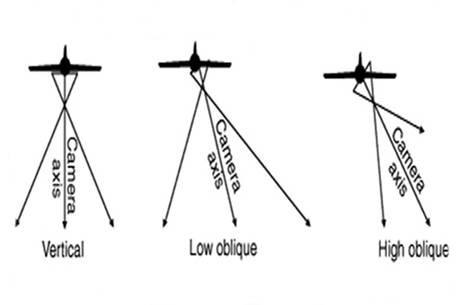
Keep in mind that, due to your vantage point, you can take three main types of shots:
- oblique or "at an angle" shots (which depending on the altitude and angle can be high angle and low angle),
- vertical or "straight down" shots (which, as the name says imply photographing things directly below you, following the nadir),
- a combination of these two (by using the panorama setting on your camera, for example, to take 1 vertical shot and then progressive oblique shots or the other way around).
Step 5.3: Take your photos!
That's the part you've been waiting for, right? Now that all the preparations and training are done, use your creativity to take some great photos from the air.
If it's your first time, remember to experiment and test as much as possible. As you experiment with each session, you'll figure out what works (for you and your clients) and what doesn't and you'll slowly get to the point at which you have an established "flow" you can rely on quickly to take professional photos that are consistent and interesting every time.
The Biggest Technical Challenges of Aerial Photography
How to Conquer Vibration
Try to minimize camera vibration as best you can (also by buying stabilizing components if yours doesn't have one). In this case, lower flight speeds are better, as the camera and lens jitter less.
Another way to conquer vibration is to use a fast shutter speed and to always hand-hold the camera. Do not rest any part of the camera, or any part of your arms on the plane, to avoid capturing blurry images. Because there is no need for depth of field, you can use large apertures for your aerial photography. You should also experiment with different ISO settings, to discover the highest setting at which your camera produces crisp images. Combine this with fast shutter speed and you should obtain great results. As a general rule of thumb, your shutter speed should be 8x your focal length.
Pro Tip:If you're shooting from a helicopter, a pro tip is to rely on your safety harnesses and equilibrium and not touch the walls of the aircraft or lean on them, because the vibration the vehicle suffers from the blades pushing air down on it is considerable and will translate through you to the camera.
Image Stabilization (IS) and Vibration Reduction (VR) lenses can also be used to minimize tremor while hand-holding. Keep in mind, however, that IR and VR lenses are not designed to reduce large amounts of vibration and wobble. This is why you should use the lenses with both ON and OFF settings, because chances are that you won’t be able to change them during flight.
How to Conquer Haze
Instead of trying to conquer the natural elements you should wait for the best time. Scheduling a plane or helicopter flight in advance will give you the option of rescheduling. In addition to this, pilots will always know visibility conditions, measured in miles. For example, unlimited visibility or over 100 miles of visibility is great. Nevertheless, even if you don’t have the perfect visibility, you have to make do with what you’re given.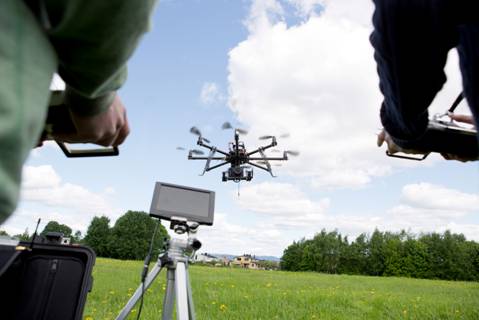
Here are a few tips that will help you cut through haze:
• If you’re shooting in black-and-white you should choose the reddest filter, because it gives you more than enough light for fast shutter speed. Stay away from the blue end of the spectrum, as it will worsen the effects of haze and clouds.
• Set your digital camera to the highest contrast. You will be surprised to see that some shots will appear to have low contrast, even if everything looks more vivid to you while flying.
• You can increase the speed of the film (to also allow faster shutter speeds) and improve your results by developing your film for high contrast.
• Use post-processing software, like Photoshop, to increase contrast and reduce the effects of haze. The easiest solution would be to use Auto Levels, which take out dull greys and increase the impact of whites and blacks.
Aerial photographs taken with the sun behind your back or with too much light result in flat photos. That happens because shadows, in this case landscapes and objects seen from above, actually help in giving a more 3D feel. If the shadows are completely eliminated you will get a 2D-like feel in your photos, which should be avoided.
Autofocus & Manual Focus
Assuming that you are using a traditional manual focus lens, you should keep it at the infinity stop, unless you’re operating with a lens of over 200mm, or at less than 1,000 feet. Whatever you do, make sure that the camera is focused at infinity before you get in the air, because even a minor error in your settings will be noticeable in the final result.
If you’re using a Nikon you should set the Autofocus to the “S” position. This will enable the camera to take spectacularly clear images, especially if you change any zoom settings.
Shutter Speed
With all the vibration, motion and wind, you will require a fast shutter speed if you are to capture clear images. You should also consider image stabilization if your shooting from the door of the helicopter. Most photographers recommend a minimum shutter speed that ranges from 1/500 to 1/1000. On some occasions 1/1000 will not be fast enough.
Tip:Take as many photos as possible. The reasoning behind this is quite simple: aerial photography involves a lot of missed shots. A unique potential of unpredictable weather, poor lighting conditions, as well as the cost of paying for the aircraft and pilot may cut your shooting session short, so it’s good to have a couple-hundred shots to choose from.
But enough about negative scenarios! Now you know all you need to know to get started as an aerial photographer. So go out there and take some great shots!